I have an abundant supply of old silicon mold sheets that I have made of random designs like chicken heads and the Breaking Bad head drawing of Walter White. These molds are often laying around and I am not a big "signer" of my work. Now I am placing them on the back side of the castings as a signature of sorts. These prints are looking better over time and now I realize I can just make the prints on the topside for rough outside work and not worry as much about the detail.
Photo Fresco
Sunday, March 19, 2017
Big Cement Pour Testing Crack Resistant Cement - Variation of molds Single release molds
 Many of my experiments require me to make a mold with the screen, then cast an original, then make a mold of that for production, which is later used for the brick making. I think that if I can just use the original mold for making the bricks it may save a lot of time and therefore a lot of money. There is also the possibility that the castings from the first mold will have higher detail than castings made from 3rd generation molds. The key is to make the mold reusable and not have to cut the mold from the frame. To make this work the casting material needs to shrink and not crack and cement always seems to shrink.
I make 5 pours with a variety of molds, 3 originals and a couple that were placed in frames, reused molds.
Friday, March 17, 2017
Variations of techniques that can be used once you have a Positive Relief Mold
This is where it gets very interesting. You can use a mold and make an object by pouring all sorts of materials into the coated frame relief. Cement, plaster, Forton MG, silicon or epoxy are my most common materials. Each material can be used for different effects. If you go straight to cement then the frame is the mold and hopefully the cement will emerge without damaging the mold.
Whatever material you use the first casting will be the opposite, so if you printed a positive then a negative will be the result. With a relief it doesn't matter much unless there is lettering involved or you are concerned about the direction of the image in the final piece. I have taken to making a solid object of high detail with the first pour using a material called Forton MG. This is a melamine based plaster that creates a ceramic like finish, then I use that solid object as the original casting and make a silicon mold of that for production purposes.
Push through an ink or solid material like acrylic paints
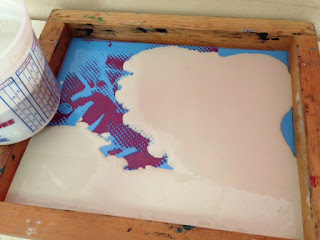
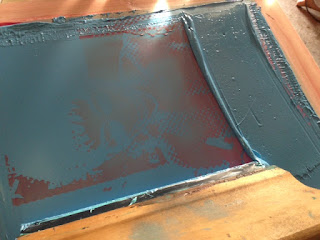
I typically use a squeegee and old screen printing inks and push them through the back side of the screen to seal the back and create a relief.
Once you have a desired height of material or ink then dry the ink using heat or leaving it somewhere to dry. Acrylic takes a long time to dry when applied this thick. I have used epoxy and polyester resins as well as thin cements, but you have to get the mixture really thick so that it does not run or bleed into the other parts of the graphic. Too much liquid ink will cause drip spots on the design because you are working with the graphic upside down.
I find that I like the dark areas of a graphic recessed and the highlights flat, so typically I make the raised areas the black areas. There are many variations and effects that you can get depending on which way you reverse the image and how you want to make the final molds and pieces. After the mold is dried and cooled I throughly spray the mold and frame with a mold release.
The process - Get a high contrast image and make a film to expose a screen
This won't be a complete lesson, just a series of blips that will show the highlights of making the photo-fresco / cement molds using screen printing. The first issue is getting an image and increasing the contrast using photoshop of some of program or method to make a film. The film is used to make a screen. The higher the contrast the less need there is for a halftone. A halftone is a series of dots that emulate shading in photos and is a typical method of making prints for reproduction. Here is a film of a Bruce Lee photo I found online.
The film is applied to a photo-sensitized screen and exposed to light. After the exposure the screen is washed out and porous areas are shown as clear spaces on the screen. These areas allow ink or other materials to be pushed through and work like a stencil for printing multiple pieces with the same graphic.
The screen should dry completely and the sunshine works great to continue to harden the emulsion. At this point you can use the screen for making a mold of the design.
Thursday, March 16, 2017
Mortar here, Motar there
I tried some motar mixes and cheap cement with aggregate. The next test should be with the Crack resistent cement that has fibers mixed in. I used this stuff before and although it sticks to my mixer it may be a good cement instead of the ones with rocks in them which inhibits details. The crack resistant stuff may also have aggregate based on how chunky the bag felt. I am trying to stay away from stucco and motar mixes appear to set so slowly that I have broke more bricks than I have finished by moving them around before they are dry and strong enough to be tossed.
Many ways to make a brick
There are many ways to make a brick, but one of the biggest decisions is which concrete or mortar to use. I have a bunch of plaster and hybrid gypsum products like Duracal and Tufstone. These materials set quick, but have a very low tolerance for water absorption and become chalky and fall apart. I like the detail I get from gypsum plaster products, but they will not last outside. For making the original castings I can use the gypsum plasters like Duracal and they look at lot like cement so they work well for samples.
Subscribe to:
Comments (Atom)


